Thursday, May 31, 2012

sneak peak


Garment Sewing Challenge: May 2012

voting soon....
Just so you know, the participants have until midnight Honolulu time, May 31st, to submit their final entries.  The photos shown may not reflect what the final entries will be.  I can only take credit for the photo of myself, 2nd row, right collumn.  Another post will come up in 2-3 days including photo credits and links to all the designers.  I just wanted to get you excited about the upcoming poll.

Hugs!

Pin It

Tuesday, May 29, 2012

DIY paternless maxi dress

Garment Sewing Challenge: May 2012

Recently I presented myself and my internet friends with a challenge.  I challenged us to sew a garment that we would be proud to wear in public.  I wanted this to be a challenge for all sewing levels so I made the stipulation that the participants needed to "try something new".  

Well, I met the challenge when I created my circle top.  But I didn't really push myself to try something new or learn a new skill.  Sewing a garment from virtually no pattern and working with a strong print were new things, but not super challenging.  So, I made another garment!  I made a maxi dress, or you might call it a long sun dress.  What do you think?
The 3 new things I tried with this dress were:
1.  Making a dress with no pattern at all!
2.  Shirring!
3.  Using "Fray Check"!

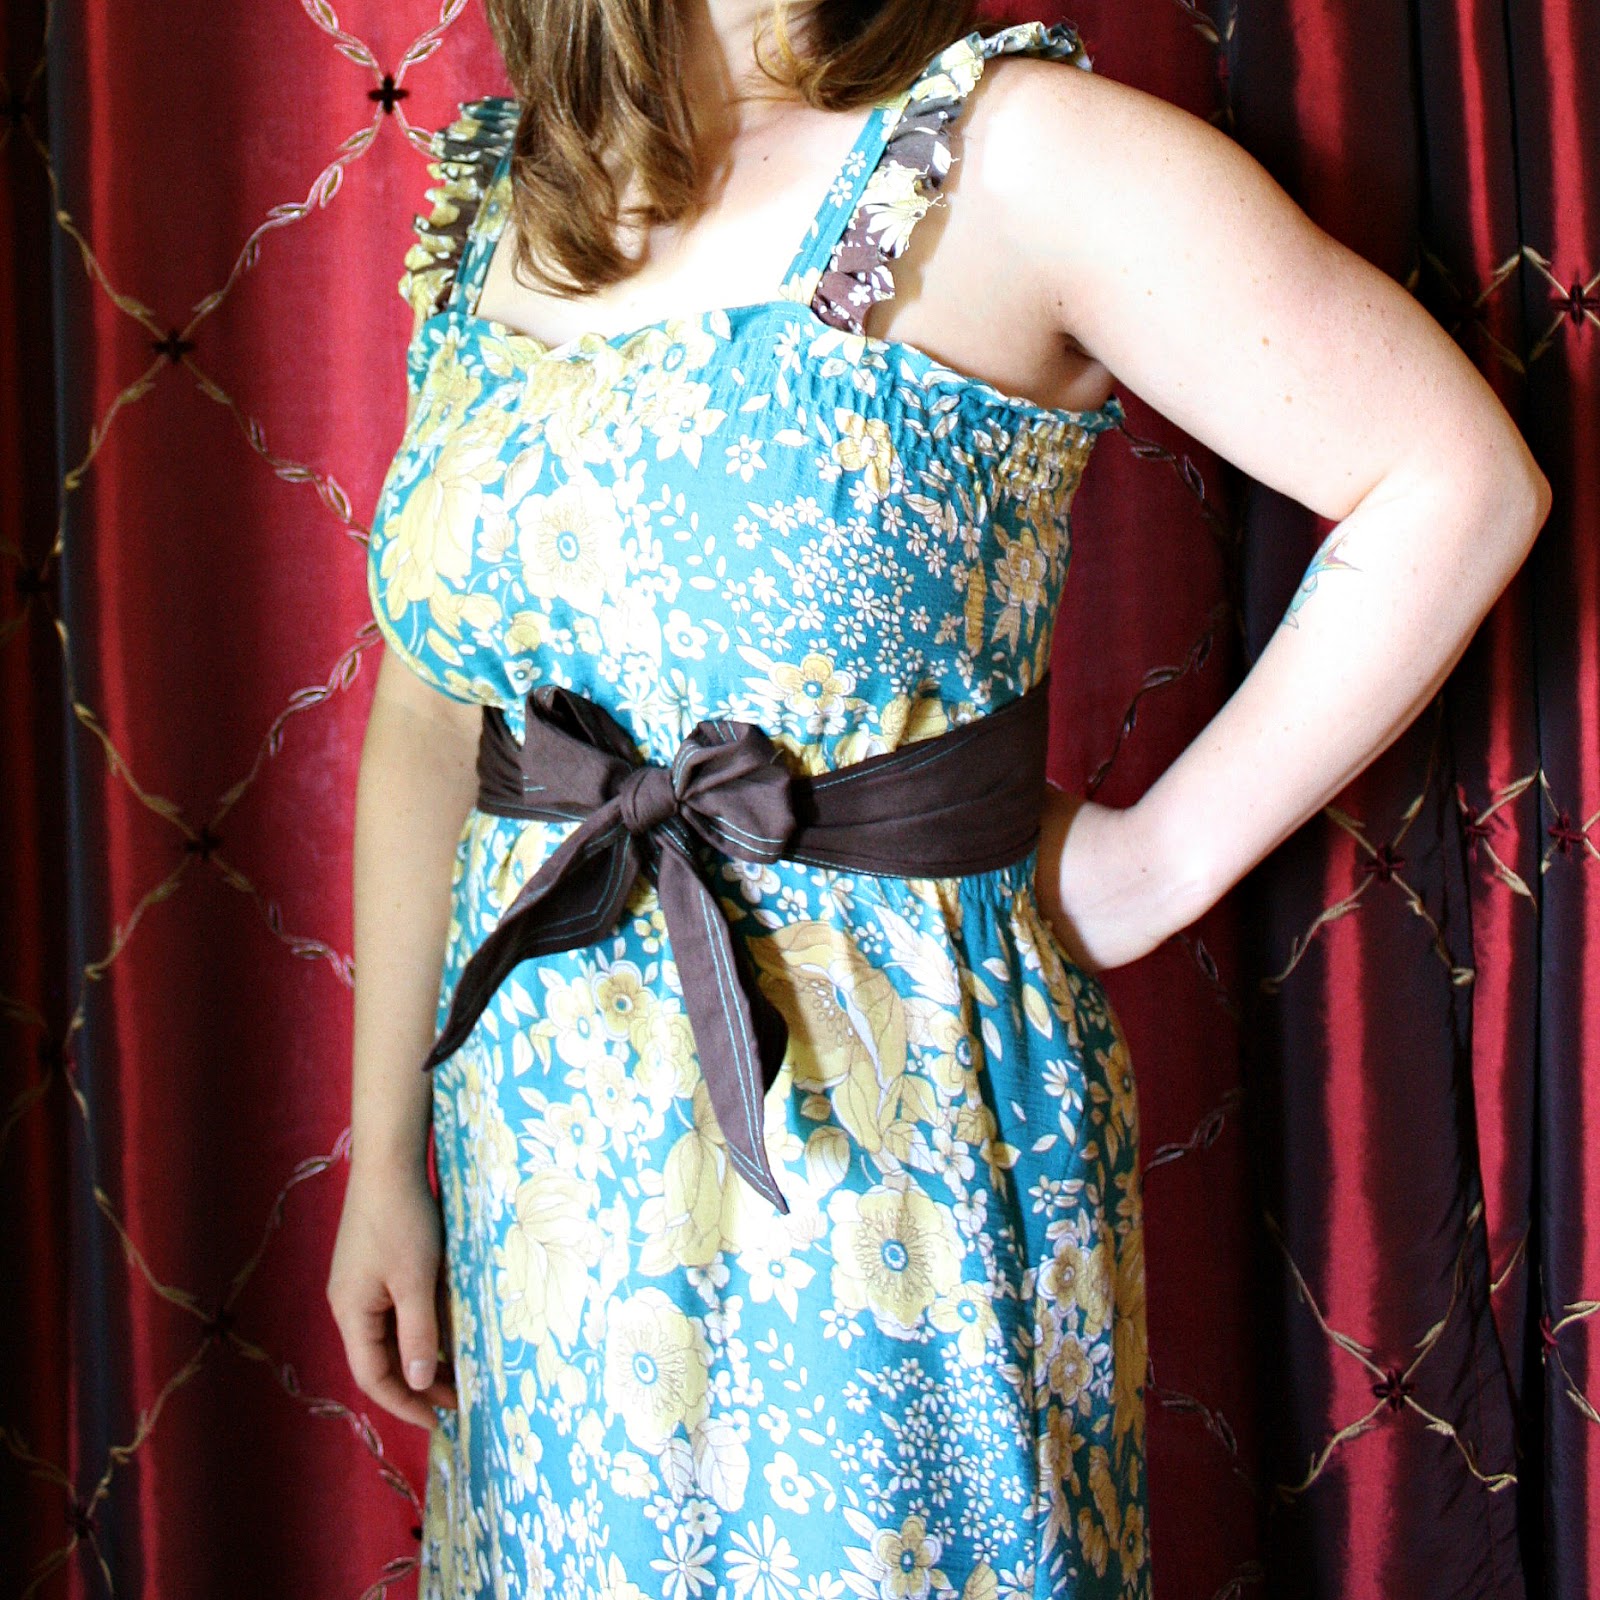
I started with a couple yards of a gauzy, crinkly, cotton floral that faded from turquoise to brown.  I don't have a dress form, so I just wrapped the fabric around myself to find an acceptable width.  I wrapped it loosely enough so I knew I had plenty of ease on my hips and around my ankles for walking.  I gave myself an extra 4 inches of overlap--just to be on the safe side--and cut into my fabric.  

I folded over the top edge twice and hemmed it.  Then I began shirring.  I shirred about 5 rows along the top edge.  I wrapped the dress around me (the dress form!) and tested the fit.  Surprisingly, it stretched all the way around me and didn't look too bad.  While I had the "dress" wrapped around me, I pinned a safety pin right under my bra line.  (One thing I hate about buying maxi dresses off the rack is that my chest is always too big for them.)  Then I made around 5 more rows or shirring under that mark.  Here's a nifty diagram I made to illustrate my point:
After all the hemming and shirring, my dress was looking a little short.  I decided to add a 4 inch border along the bottom hem.  I started with a 9 inch wide strip of brown cotton that was ling enough to go all the way around the bottom of the dress.  I ironed and sewed it to the dress sort of like this:

The brown band added some weight to the bottom of the dress, both visually and functionally.  I liked it!  Using my own body as a dress form and a quilter's supply of safety pins, I pinned the dress closed and sewed up the side.  I left the bottom of this seam open about 14 inches.  I folded the edge over twice and stitched up the raw edges, creating a slit.  Now, I can cross my legs or climb up the bleachers at the ballpark without needing to hike my dress very much.  The sides of the slit are a little wonky and wavy, but I'm not sweating it.  For future reference, I'll have to remember to reinforce those edges so they'll lay nice and flat.

At this point I knew I needed straps.  Hello, this girl needs to wear a bra and those strapless ones are no good for me.  But I put this idea aside because I had a fit problem.  With the shirring placed where it was, the front looked great.  However, the back area between the shirring was loose and baggy having nothing to fill it.  So I tightened it up with several more rows of shirring just in the back.  Awwww, shirring is good!!!

So with that problem fixed, I moved on to the straps.  I made the straps pretty much like I made the brown band, only smaller.  I gathered a 1.5 inch strip of fabric and stitched it into the straps.  If you'll forgive the inaccuracy of my diagram, the straps and ruffles are made from the same floral fabric, you'll see what I mean here:

I constructed the straps, donned the dress once more, safety pinned the straps to the dress, and then stitched them together.  Easy, right?  No I forgot to mention the easiest part:  I didn't finish the edges of my ruffles on the straps.  Instead, I used a product called Fray Check.  I just dabbed a small amount of the liquid on the raw edges, allowed it to dry, and no more fraying!  The edges are stiff, almost as if I used a clear nail polish on them, but the finish is matte and fabric is still flexible.  I've washed it once, and it's still intact.  Neat stuff!

The last step was to make a sash out of the brown to tie around the empire waistline of the dress.  It was an addition suggested by my 5 year old daughter.  A good call, I'd say.  I tried tying it in the front as well, but prefer it tied in the back sans the bow.


So there you have it!  If I can do it, so can you!

Here are the shirring tutorials I used:

http://www.rufflesandstuff.com/2010/02/shirring-tutorial.html

http://www.makeit-loveit.com/2011/11/sewing-tip-shirringsmocking-with-elastic-thread.html

I have a Singer HD4423 with a drop in bobbin.  I wound the elastic thread by hand.  I set my tension to 3.  I had no problem whatsoever.  Easy-peasy, I swear!

Happy crafting and big hugs from Montana,

Pin It

Thursday, May 24, 2012

I Will Wear it in Public Challenge Completed!

First of all, if you have heard about May's garment sewing challenge, you can read all about it here:
Garment Sewing Challenge: May 2012


So here it is!  I've completed the sewing challenge and am moderately pleased with my results.  I wore the top to pick up my kids from school.  I talked to a couple moms and some teachers, but really won't have a chance to wear it "out" until Mr. Ricochet plans our next date night.  

To refresh your memories about the previous post I made about this project, I began with this large piece of printed, flowy, silk-like fabric:


Then I thought this "circle top" would be the perfect pattern for this wild print.  Here's a pic and link to the easy-peasy tutorial:
[Sweet Lemonyde's cool tutorial]
I wanted to have the center of the print (the bulls-eye if you will) to be centered on my chest.  With a bit of finagling, I managed to find out where to fold the fabric in order for the print to land in the right spot.  Then to my dismay, I discovered that the back of the shirt wouldn't have enough fabric to match the length in the front.  I solved this by taking a strip of fabric from the front and adding it to the back.  Then, I folded the fabric into quarters and cut off a rounded corner to create an overall oval, or more exactly a lozenge shaped piece.  You can see how I added the stripe of fabric and how I made the cut here:


The sewing entailed hemming the entire perimeter of the lozenge.  I folded and pressed the edge over twice hiding the raw edges.  Then I sewed two neat rows of stitching all the way around (yellow line in pic below).  I cut out a v-shaped neck line and trimmed it with black bias tape (blue lines).  Then I sewed up the sides (pink lines).


I thought I was done, but he neckline would not lay flat.  This was because I didn't "ease" the bias tape as I sewed it on.  To fix this I simply added some well-placed tucks/pleats into the neckline.  You can see in the photo below that this caused a little pucker in the fabric:


Another unanticipated result of this neckline construction was that the neck hole was so large that it fell off my shoulders.  To remedy this problem, I added a strap connecting the sides as you can see here:


Eventually I got it done and I'm variably happy with how it turned out.  


I've decided I like it a bit more when it's tucked into jeans:


Because of windy and rainy weather I had to shoot inside using the timer on my camera.  The photos didn't turn out great and I had to edit them a great deal to take down the bright glare from the windows.  Pippa, my faithful canine companion, acted as my assistant.  We've had her for around 4 months now and she is such a joyful addition to our family.  She's a cocker spaniel and poodle mix (cockapoo) and we rescued her from the local animal shelter.  


Not to mention how stinking cute she is!  She just got back from the groomers and is sporting a pretty bow in her hair.  I think she matches my outfit perfectly!


All in all, I think this project was successful and I ended up with a wearable garment.  While I like the bold print and how I employed it, I'm a little disappointed in the fit.  It's very comfortable and I'm known for wearing bold prints, but I think over-sized billowy tops look better on thinner gals while curvy gals like myself end up looking bigger than they actually are.  I think I can tweak the garment to make it compliment my figure a bit more and look less like a muumuu.

Floral MuuMuu Pink
[source]
example of a muumuu

I'm considering taking it in a just a smidge on the sides and shortening the "sleeves" so they end above my elbow.  What do you think?  Leave it or make some adjustments?

Stay tuned for the voting portion of the garment sewing challenge coming up in the beginning of June.

Happy crafting and big hugs from Montana,
Pin It

Monday, May 14, 2012

Motherhood Rocks!


Yesterday was Mother's Day in the US.  I got my b'fast in bed, wonderful handmade cards and gifts, and a lovely BBQ dinner.  While I was reading cards from my 5 & 7 year olds, I remembered a time when they were little enough to rock to sleep.  That time is long gone, but they will always be my sweet babies.

Hugs to all you moms out there!


Tuesday, May 1, 2012

Typography Challenge Winners!

Maybe it's just me, but it seems like ages ago that we were working on completing our typography challenge entries.  You see, it was way back in mid February when Keren (sew la vie!) and I started recruiting participants, the challenge ran through March, and then we voted all through April.  And now I bet you're super curious about who captured the most votes.  Well, don't scroll down yet!  I consider that cheating.

A brief challenge history:

First we had the Retro Pillow Challenge, then the Solids-Only Tote Challenge, then the Naughty Notions Challenge, and now we finally bringing the Typography Challenge to a close.  Next up for May 2012 is the "I Will Wear it in Public!" Garment Sewing Challenge.

About voting:

Keren and I use Polldaddy.com to create a poll for each challenge.  The poll lasts for one month.  The 3 entries with the most votes are hailed as challenge winners and receive super-neato badges and bragging rights.  Anyone can vote once per day.  In the spirit of good sportsmanship, we only ask that no one offer anything in exchange for votes.

To all the challenge participants:

Thanks so much for all your hard work.  Not only did you strive to follow the challenge guidelines and submit your creative entries before the deadline, you worked hard to promote the challenge as well.  Thank you so much!  Let's take one more look at the wonderful entries:
  1. Ampersand wall art by Cameron at Homemade
  2. Citrisolv image transfer dishtowels by Jenni at Who Makes Up This Craft?
  3. Create appliqued and quilted pillow by Laura at Quokka Quilts
  4. Fabric letter and number sets by Pam from Threading My Way

5.  Vinyl sticker cuckoo clock by Donatella from Inspiration&Realisation
6.  P.S. I Love You bag by Tanya from Carft Couture by TC

7.  Lacey used applique, stamps and fabric paint to make these napkins.
8.  Applique pillow by Nadia from The Pink Pixie
9.  Embroidered pillow by Keren from sew la vie (challenge hostess)
10.  Table linen set crafted by Paula from Paula Castro Crafts

11.  Reverse applique Molly pillow by Jaime from That's My Letter
12.  Home Sweet Home wall art by Kei from Unfortunately Oh!
13.  Mr. & Mrs. pillows by Rikka from Ricochet and Away!  (challenge hostess)
14.  Typography Challenge Hompage.
And now (cue drum roll) for the winners of the 2012 Typography Challenge:

Gold Star Badge goes to Paula from Paula Castro Crafts for her typographical table linens!


First Place Typography Challenge!

Silver Star Badge goes to Donatella from Inspiration&realisation for her vinyl cuckoo clock!

Second Place Typography Challenge


There was a tie for third place!  One Bronze Star Badge goes to Laura from Quokka Quilts for her "Create" pillow!

Third Place Typography Challenge!


Excellent work ladies!  Wear your badges with pride and start bragging!  Congratulations!!!!!

Don't forget about our May 2012 challenge!  Sign up now.  Entries are due May 31st.
Garment Sewing Challenge: May 2012

Happy crafting and big hugs from Montana,
Pin It
Related Posts Plugin for WordPress, Blogger...